Export Mania 2017 - Webdrawer
This is the fourth of four posts related to the exportation of records from Content Manager. Here I'll review a little of the feature functionality within Webdrawer. You may wish to review the first three posts before continuing below (DataPort, Tag & Task, Record Addin).
The out-of-the-box webdrawer interface provides three opportunities to download an electronic attachment. Each of these options will direct the user's browser to a URL that delivers the attachment to the browser. The name of the downloaded file will be the suggested file name property.
In the screenshot below you can see the download link (appears as 'Document') to the right. The same link is provided within the viewer, which appears when you select the Preview link.

Record Detail Page download link
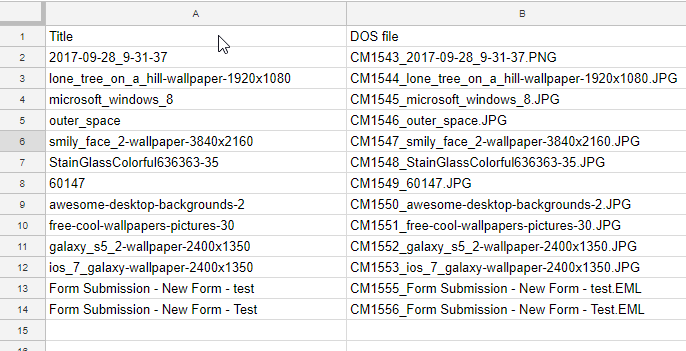
The downloaded file name in this example ends up being "2017-09-28_9-31-37.png".
The third option exists as an option in the configuration file. The default setting is "Metadata", but you can change this to "Document". You could also change it to preview (which shows you the preview, which then provides a download link).

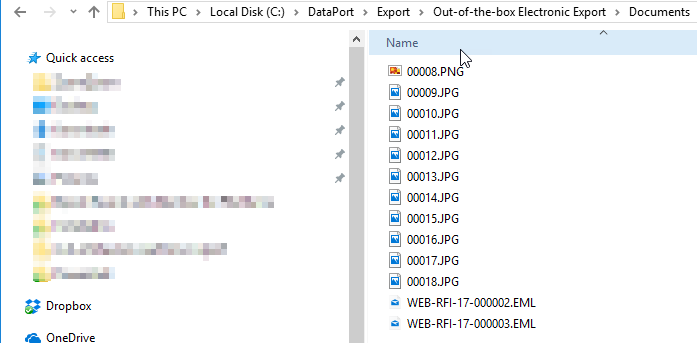
If I make this change (to Document) then clicking on a link in the search results page results in the file being downloaded.

I can't say I find that very useful, but it is what it is. I'll revert this back to a metadata link and then explore options.
One quick win is to add the "download" attribute to a link. This works for Chrome and Firefox for sure, but if you're using Internet Explorer STOP IT. I modified my resultsList.cshtml file (located in the Views/Shared directory) and added a new column with a new button.

To accomplish this I made three changes. First I added a new column in the table header row, like shown below.

Next I created a variable that contains my desired file name...

var desiredFileName = record.GetPropertyOrFieldString("RecordNumber") + "." + record.GetPropertyOrFieldString("RecordExtension");
Then I added my column, as shown below...

Now these links will download the file using my desired convention! Next I should go ahead and add a "Download All" link at the top. That button uses jquery to iterate all of the buttons I added and clicks each one.
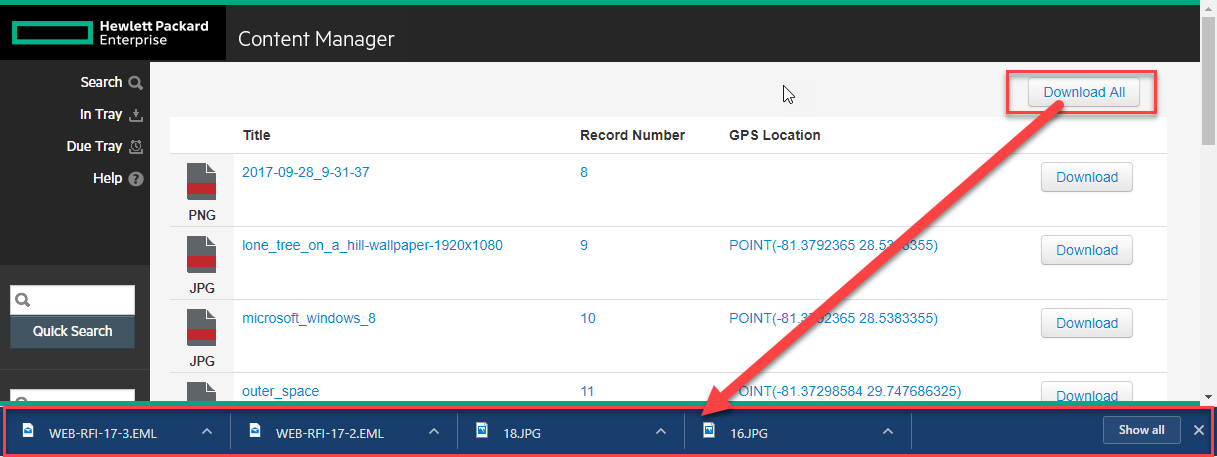
Download All clicks all download buttons sequentially
The javascript for this is below.
function downloadFiles() {
    $('a:not([download=""])').each(function() {
        if ( this.href.indexOf('/Record/') > 0 && this.id.indexOf('.') > 0 ) {
            this.click();
        }
    });
}
In order for it to work, you must also add the desiredFileName value into the anchor's ID property.
<a id="@desiredFileName" download="@desiredFileName" href="@recordUrl">Download</a>
I should also give a meta-data file though too, no? To accomplish this I add a button at the top and have it call "downloadMetadata".

The meta-data file includes the title and record number, but it could include anything you want...
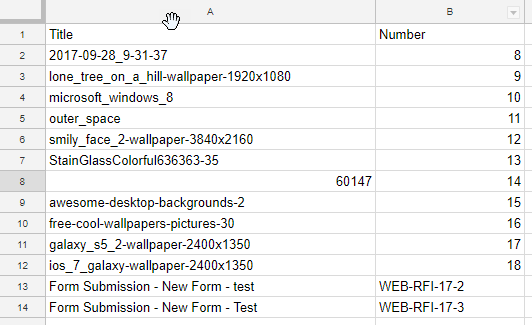
To get this to work I first needed to give myself a way to access each row in the results table, as well as a way to access the meta-data values. I did this by decorating the row with a class and the column values with IDs. The screenshot below shows these two modifications.

Lastly, I added a new javascript function into the webdrawer.js file. I've included it below for reference.
function downloadMetadata() {
    var data = [['Title','Number']];
    $('tr.record').each(function() {
        var title = $(this).find('#RecordTitle').text();
        var number = $(this).find('#RecordNumber').text();
        data.push([title, number]);
    });
    var csvContent = "data:text/csv;charset=utf-8,";
    data.forEach(function(infoArray, index){

       dataString = infoArray.join('\t');
       csvContent += index < data.length ? dataString+ "\n" : dataString;

    });
    var encodedUri = encodeURI(csvContent);
    var link = document.createElement("a");
    link.setAttribute("href", encodedUri);
    link.setAttribute("download", "meta-data.csv");
    document.body.appendChild(link);
    link.click();
}
So much more can be done, like zipping all the results via JSZip. As mentioned before, I could also include all results of the search, if necessary. Hopefully this gives the OP some ideas about how to tackle their business requirement.