Export Mania 2017 - Record Addin

This is the third of four posts trying to tackle how to achieve the export of a meta-data file along with electronic documents.  We need/want to have the electronic documents to have the record number in the file names, instead of the standard (read: oddball) naming conventions of the various features.  In this post I'll show how to create a custom record addin that achieves the requirement.

So let's dive right on in!


I created a new C# Class library, imported the CM .Net SDK (HP.HPTRIM.SDK), and created an Export class that will implement the ITrimAddin interface.

2017-10-16_19-03-38.png

Next I'll use the Quick Action feature of Visual Studio to implement the interface.  It generates all of the required members and methods, but with exceptions for each.  I immediately reorganized what was generated and update it so that it does not throw exceptions.

Collapsed appearance of the class

Collapsed appearance of the class

I find it helpful to organize the members and methods into regions reflective of the features & functionality.  For this particular add-in I will ignore the "Save and Delete Events" and "Field Customization" regions.  Currently my private members and public properties regions look like shown below.

#region Private members
private string errorMessage;
#endregion
 
#region Public Properties
public override string ErrorMessage => errorMessage;
#endregion

If I expand my Initialization region I see two methods: Initialise and Setup.  Initialise is invoked the first time the add-in is loaded within the client.  Setup is invoked when a new object is added.  For now I don't truly need to do anything in either, but in the future I would use the initialise method to load any information needed for the user (maybe I'd fetch the last extraction path from the registry, a bunch of configuration data from somewhere in CM, etc).

#region Initialization
public override void Initialise(Database db)
{
}
public override void Setup(TrimMainObject newObject)
{
}
#endregion

Next I need to tackle the external link region.  There are two types of methods in this region: ones that deal with the display of menu links and the others that actually perform an action.  My starting code is shown below.  

#region External Link
public override TrimMenuLink[] GetMenuLinks()
{
    return null;
}
public override bool IsMenuItemEnabled(int cmdId, TrimMainObject forObject)
{
    return false;
}
public override void ExecuteLink(int cmdId, TrimMainObject forObject, ref bool itemWasChanged)
{
 
}
public override void ExecuteLink(int cmdId, TrimMainObjectSearch forTaggedObjects)
{
}
#endregion

First I'll tackle the menu links.  The TrimMenuLink class, shown below, is marked as abstract.  This means I need to create my own concrete class deriving from it. 

2017-10-16_18-20-50.png

Note that the constructor is marked protected.  Thankfully, because of that, I can eventually do some creative things with MenuLink (maybe another blog post someday).  For now I'll just add a class to my project named "ExportRecordMenuLink".  I apply the same process to it once it's generated, giving me the results below.

using HP.HPTRIM.SDK;
 
namespace CMRamble.Addin.Record.Export
{
    public class ExportRecordMenuLink : TrimMenuLink
    {
        public override int MenuID => 8001;
 
        public override string Name => "Export Record";
 
        public override string Description => "Exports records to disk using Record Number as file name";
 
        public override bool SupportsTagged => true;
    }
}

Now that I've got a Menu Link for my add-in, I go back and to my main class and make a few adjustments.  First I might as well create a private member to store an array of menu links.  Then I go into the intialise method and assign it a new array (one that contains my new addin).   Last, I have the GetMenuLinks method return that array.  

private TrimMenuLink[] links;
 
public override void Initialise(Database db)
{
    links = new TrimMenuLink[1] { new ExportRecordMenuLink() };
}
public override TrimMenuLink[] GetMenuLinks()
{
    return links;
}

The IsMenuItemEnabled method will be invoked each time a record is "selected" within the client.  For my scenario I want to evaluate if the object is a record and if it has an electronic document attached.  Though I also need to ensure the command ID matches the one I've created in the ExportRecordMenuLink.

public override bool IsMenuItemEnabled(int cmdId, TrimMainObject forObject)
{
    return (links[0].MenuID == cmdId && forObject.TrimType == BaseObjectTypes.Record && ((HP.HPTRIM.SDK.Record)forObject).IsElectronic);
}

Almost done!  There are two methods left to implement, both of which are named "ExecuteLink".  The first deals with the invocation of the add-in on one object.  The second deals with the invocation of the add-in with a collection of objects.  I'm not going to waste time doing fancy class design and appropriate refactoring.... so pardon my code.  

public override void ExecuteLink(int cmdId, TrimMainObject forObject, ref bool itemWasChanged)
{
    HP.HPTRIM.SDK.Record record = forObject as HP.HPTRIM.SDK.Record;
    if ( (HP.HPTRIM.SDK.Record)record != null && links[0].MenuID == cmdId )
    {
        FolderBrowserDialog directorySelector = new FolderBrowserDialog() { Description = "Select a directory to place the electronic documents", ShowNewFolderButton = true };
        if (directorySelector.ShowDialog() == DialogResult.OK)
        {
            string outputPath = Path.Combine(directorySelector.SelectedPath, $"{record.Number}.{record.Extension}");
            record.GetDocument(outputPath, falsestring.Empty, string.Empty);
        }
    }
}

In the code above I prompt the user for the destination directory (where the files should be placed).  Then I formulate the output path and extract the document.  I should be removing any invalid characters from the record number (slashes are acceptable in the number but not on the disk), but again you can do that in your own implementation.

I repeat the process for the next method and end up with the code shown below.

public override void ExecuteLink(int cmdId, TrimMainObjectSearch forTaggedObjects)
{
    if ( links[0].MenuID == cmdId )
    {
        FolderBrowserDialog directorySelector = new FolderBrowserDialog() { Description = "Select a directory to place the electronic documents", ShowNewFolderButton = true };
        if (directorySelector.ShowDialog() == DialogResult.OK)
        {
            foreach (var taggedObject in forTaggedObjects)
            {
                HP.HPTRIM.SDK.Record record = taggedObject as HP.HPTRIM.SDK.Record;
                if ((HP.HPTRIM.SDK.Record)record != null)
                {
                    string outputPath = Path.Combine(directorySelector.SelectedPath, $"{record.Number}.{record.Extension}");
                    record.GetDocument(outputPath, falsestring.Empty, string.Empty);
                }
            }
        }
    }
}

All done!  Now, again, I left out the meta-data file & user interface for now.  If anyone is interest then add a comment and I'll create another post.  For now I'll compile this and add it to my instance of Content Manager.  

2017-10-16_18-52-41.png

Here's what it looks like so far for the end-user.

2017-10-16_18-53-56.png

A wise admin would encourage users to place this on a ribbon custom group, like shown below.

2017-10-16_18-56-04.png

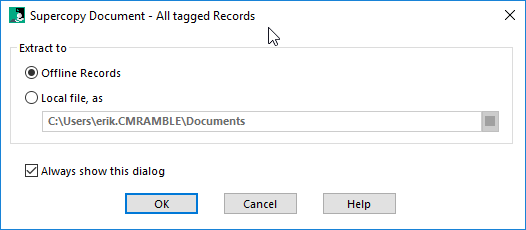
When I execute the add-in on one record I get prompted for where to place it...

2017-10-16_18-57-08.png

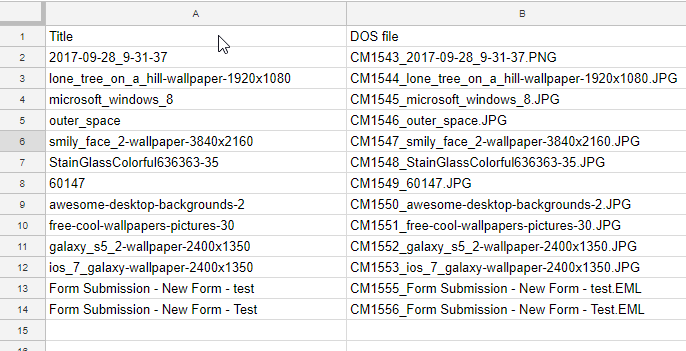
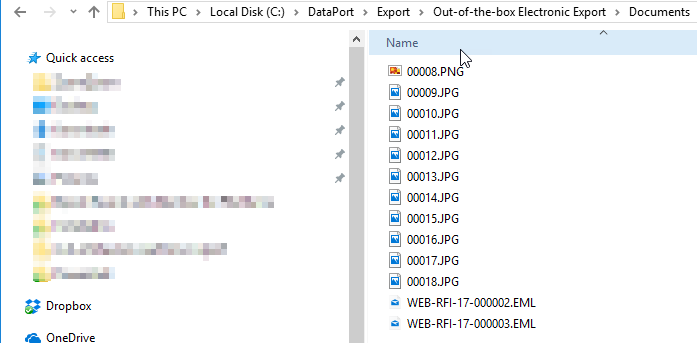
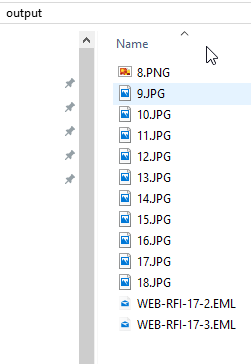
Success!  It gave me my electronic document with the correct file name.

2017-10-16_18-58-41.png

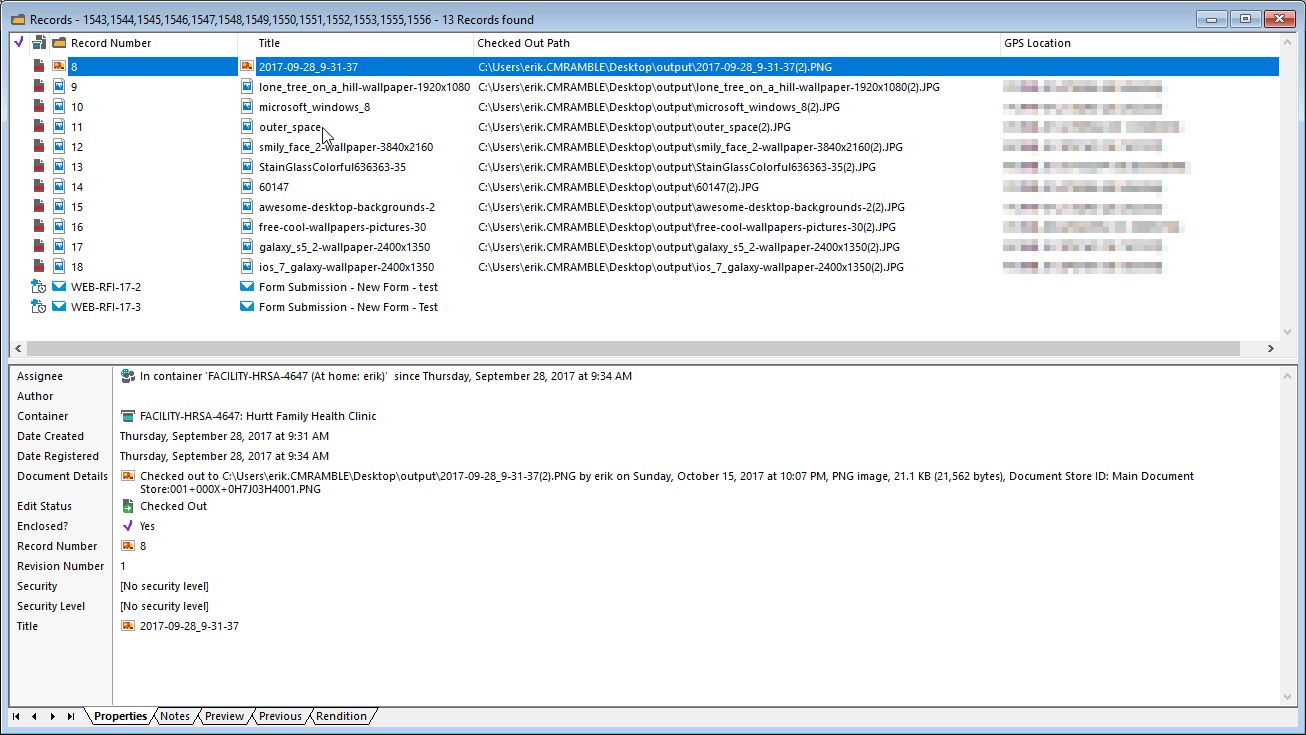
Now if I try it after tagging all the records, the exact same pop-up appears and all my documents are extracted properly.

2017-10-16_19-00-20.png

Hopefully with this post I've shown how easy it is to create custom add-ins.  These add-ins don't necessarily need to be deployed to everyone, but often times that is the case.  That's the main reason people shy away from them.  But deploying these is no where near as complicated as most make it seem.

You can download the full source here.

Export Mania 2017 - Tag and Task

Warning: this post makes the most sense if you've read the previous post....

If I use the thick client I can tag one or more records and then execute any task (I prefer to refer to these as commands, since that's how the SDK references it).  In this post I'll show these tasks, the output, and how they may (or may not) achieve my goal.  My goal being the export of a meta-data file with corresponding electronic documents (where the file name is the record number).

The commands we can execute include:

  1. Supercopy
  2. Check-out
  3. Save Reference
  4. Print Merge
  5. Export XML
  6. Web Publish

If I tag several records and then initiate any of these commands, I'll get prompted to confirm if I'm intending to use the highlighted item or tagged items.  You can suppress this by unchecking the checkbox, but I let it alone (so there's no confusion later).  Once I click OK I can see the dialog for the selected task.

2017-10-15_21-54-20.png

As you can see below, the supercopy command let's me save just the electronic documents into a folder on my computer or my offline records tray.  The resulting electronic documents are titled using the suggested file name property of the record(s).

2017-10-15_21-55-12.png

The resulting files contain just the suggest file name.  It does not include record number, dataset id, or any additional information.  I also cannot get a summary meta-data file.  So this won't work for my needs.

2017-10-15_22-05-22.png

Check-out does the exact same thing as supercopy, but it updates CM to show that the document(s) are checked-out.  Since emails cannot be checked-out, this task fails for 2 of my selected records.  That means they won't even export.  

2017-10-15_22-07-50.png

So supercopy and check-out don't meet my requirements.  Next I try the "Make reference" feature, which gives me two options:

Here's what each option creates on my workstation...

Single Reference File

2017-10-15_22-11-43.png

Multiple Reference Files

2017-10-15_22-10-50.png

When I click the single reference file Content Manager launches and shows me a search results window with the records I tagged & tasked.  The multiple reference files all did the same thing, with each record in its' own search results window.  In both cases there are no electronic documents exported.

Single Reference File

2017-10-15_22-13-24.png

Multiple Reference Files

2017-10-15_22-16-19.png

Now I could craft a powershell script and point it at the results of my reference file(s).  The reference file includes the dataset ID and the unique record IDs. As you can see below, the structure of the file is fairly easy to decipher and manage.

Single reference file format

Single reference file format

I don't really see a point in writing a powershell script to make references work.  Next on the list is Print Merge. As shown below, this is a nightmare of a user interface.  It's one of the most often complained about user interfaces (from my personal experience).  The items are not in alphabetical order! 

2017-10-15_22-28-00.png

It's funny because this feature gives me the best opportunity to export meta-data from within the client, but it cannot export electronic documents.  So I need to move onto the next option: web publisher.

The web publisher feature would have been cool in 1998.  I think that's when it was built and I don't think anyone has touched it since.  When I choose this option I'm presented with the dialog below.

2017-10-15_22-34-49.png

I provided a title and then clicked the KwikSelect icon for the basic detail layout.  I didn't have any, so I right-clicked and selected New.  I gave it a title, as shown below.

2017-10-15_22-32-26.png

Then I selected my fields and clicked OK to save it.  

When I selected the new basic layout and then clicked OK, I get the following results.  Take note of the file naming convention.  That makes 3 different conventions so far (DataPort, Supercopy, Webpublisher).

2017-10-15_22-39-44.png

Opening the index file shows me this webpage...

 
2017-10-15_22-40-28.png
 

I'm pretty sure the idea here was to provide a set of files you could upload to your fancy website, like a city library might do. I tell people it's best for discovery requests... where you can burn someone a CD that let's them browse the contents. 

Time to move onto the last option: XML.  When I first saw this feature my mind immediately thought, whoa cool!  I can export a standardized format and use Excel source task pane to apply an XML map.  Then when I open future XML exports I can easily apply the map and have a fancy report or something.  I was wrong.

Here's the dialog that appears when you choose XML Export... I pick an export file name, tell it to export my documents, and throw in some indents for readability.  Note the lack of meta-data fields and export folder location.

2017-10-15_22-44-29.png

Then I let it rip and check out the results...

2017-10-15_22-47-09.png

I would gladly place a wager that these 4 different naming conventions were created by 4 different programmers.  The contents of the XML isn't really surprising...

<?xml version="1.0" encoding="ISO-8859-1" standalone="no" ?>
<TRIM version="9.1.1.1002" siteID="sdfsdfsdfsdfd" databaseID="CM" dataset="CMRamble" date="Sunday, October 15, 2017 at 10:46:50 PM" user="erik">
  <RECORD uri="1543">
    <ACCESSCONTROL propId="29">View Document: &lt;Unrestricted&gt;; View Metadata: &lt;Unrestricted&gt;; Update Document: &lt;Unrestricted&gt;; Update Record Metadata: &lt;Unrestricted&gt;; Modify Record Access: &lt;Unrestricted&gt;; Destroy Record: &lt;Unrestricted&gt;; Contribute Contents: &lt;Unrestricted&gt;</ACCESSCONTROL>
    <ACCESSIONNUMBER propId="11">0</ACCESSIONNUMBER>
    <BARCODE propId="28">RCM000016V</BARCODE>
    <CLASSOFRECORD propId="24">1</CLASSOFRECORD>
    <CONSIGNMENT propId="22"></CONSIGNMENT>
    <CONTAINER uri="1543" type="Record" propId="50">8</CONTAINER>
    <DATECLOSED propId="7"></DATECLOSED>
    <DATECREATED propId="5">20170928093137</DATECREATED>
    <DATEDUE propId="9"></DATEDUE>
    <DATEFINALIZED propId="31"></DATEFINALIZED>
    <DATEIMPORTED propId="440"></DATEIMPORTED>
    <DATEINACTIVE propId="8"></DATEINACTIVE>
    <DATEPUBLISHED propId="111"></DATEPUBLISHED>
    <DATERECEIVED propId="1536">20170928093449</DATERECEIVED>
    <DATEREGISTERED propId="6">20170928093449</DATEREGISTERED>
    <DATESUPERSEDED propId="1535"></DATESUPERSEDED>
    <DISPOSITION propId="23">1</DISPOSITION>
    <EXTERNALREFERENCE propId="12"></EXTERNALREFERENCE>
    <FOREIGNBARCODE propId="27"></FOREIGNBARCODE>
    <FULLCLASSIFICATION propId="30"></FULLCLASSIFICATION>
    <GPSLOCATION propId="1539"></GPSLOCATION>
    <LASTACTIONDATE propId="21">20171015224650</LASTACTIONDATE>
    <LONGNUMBER propId="4">00008</LONGNUMBER>
    <MANUALDESTRUCTIONDATE propId="122"></MANUALDESTRUCTIONDATE>
    <MIMETYPE propId="82">image/png</MIMETYPE>
    <MOVEMENTHISTORY propId="33"></MOVEMENTHISTORY>
    <NBRPAGES propId="83">0</NBRPAGES>
    <NOTES propId="118"></NOTES>
    <NUMBER propId="2">8</NUMBER>
    <PRIORITY propId="13"></PRIORITY>
    <RECORDTYPE uri="2" type="Record Type" propId="1">Document</RECORDTYPE>
    <REVIEWDATE propId="32"></REVIEWDATE>
    <SECURITY propId="10"></SECURITY>
    <TITLE propId="3">2017-09-28_9-31-37</TITLE>
    <RECORDHOLDS size="0"></RECORDHOLDS>
    <ATTACHEDTHESAURUSTERMS size="0"></ATTACHEDTHESAURUSTERMS>
    <LINKEDDOCUMENTS size="0"></LINKEDDOCUMENTS>
    <CONTACTS size="4">
      <CONTACT uri="6185">
        <FROMDATETIME propId="157">20170928093449</FROMDATETIME>
        <ISPRIMARYCONTACT propId="161">No</ISPRIMARYCONTACT>
        <LATESTDATETIME propId="158">20170928093449</LATESTDATETIME>
        <LOCATION uri="5" type="Location" propId="155">erik</LOCATION>
        <NAME propId="150">erik</NAME>
        <RETURNDATETIME propId="159"></RETURNDATETIME>
        <TYPEOFCONTACT propId="152">0</TYPEOFCONTACT>
        <TYPEOFRECORDLOCATION propId="151">3</TYPEOFRECORDLOCATION>
      </CONTACT>
      <CONTACT uri="6186">
        <FROMDATETIME propId="157">20170928093449</FROMDATETIME>
        <ISPRIMARYCONTACT propId="161">No</ISPRIMARYCONTACT>
        <LATESTDATETIME propId="158">20170928093449</LATESTDATETIME>
        <NAME propId="150">FACILITY-HRSA-4647 (At home)</NAME>
        <RETURNDATETIME propId="159"></RETURNDATETIME>
        <TYPEOFCONTACT propId="152">1</TYPEOFCONTACT>
        <TYPEOFRECORDLOCATION propId="151">0</TYPEOFRECORDLOCATION>
      </CONTACT>
      <CONTACT uri="6187">
        <FROMDATETIME propId="157">20170928093455</FROMDATETIME>
        <ISPRIMARYCONTACT propId="161">No</ISPRIMARYCONTACT>
        <LATESTDATETIME propId="158">20170928093455</LATESTDATETIME>
        <NAME propId="150">FACILITY-HRSA-4647 (In container)</NAME>
        <RETURNDATETIME propId="159"></RETURNDATETIME>
        <TYPEOFCONTACT propId="152">2</TYPEOFCONTACT>
        <TYPEOFRECORDLOCATION propId="151">1</TYPEOFRECORDLOCATION>
      </CONTACT>
      <CONTACT uri="6188">
        <FROMDATETIME propId="157">20170928093449</FROMDATETIME>
        <ISPRIMARYCONTACT propId="161">No</ISPRIMARYCONTACT>
        <LATESTDATETIME propId="158">20170928093449</LATESTDATETIME>
        <LOCATION uri="5" type="Location" propId="155">erik</LOCATION>
        <NAME propId="150">erik</NAME>
        <RETURNDATETIME propId="159"></RETURNDATETIME>
        <TYPEOFCONTACT propId="152">0</TYPEOFCONTACT>
        <TYPEOFRECORDLOCATION propId="151">2</TYPEOFRECORDLOCATION>
      </CONTACT>
    </CONTACTS>
    <RELATEDRECORDS size="0"></RELATEDRECORDS>
    <RENDITIONS size="0"></RENDITIONS>
    <REVISIONS size="0"></REVISIONS>
    <CONTENTSOF>
    </CONTENTSOF>
    <FORRECORD>
    </FORRECORD>
    <ELECTRONICDOCUMENTLIST>
      <FILE>records_1543.PNG</FILE>
    </ELECTRONICDOCUMENTLIST>
  </RECORD>

On the positive side, I do get the file name, title, and record number.  However, the uniqueness of this XML structure is for the birds.  I could craft a powershell script to tackle renaming the files and such, but I refuse to do so.  I protest the rubbish in this file.  Fly away little Xml document.... fly, fly away.

All this tagging and tasking helps me know my options for the future, but it also demonstrates clearly that I'm looking in the wrong places.  Unique requirements like these (exporting documents with numbered file names) means I need to either build something custom.  In the next posts I'll show several options for custom exporting.

Export Mania 2017 - DataPort

Someone asked a vague question over on the forum about exporting electronic documents.  Since I haven't done a post about exporting yet, I thought this would be a good topic to cover.  The OP wasn't specific about how to go about exporting so we'll cover them all over the coming posts!

Let's define a few requirements:

  1. There will be a file exported that include's meta-data for the given record(s)
  2. There will be a folder created to contain the electronic documents for the given record(s)
  3. The names of the electronic documents shall be the record numbers and not the record titles

Let's see how to accomplish this with DataPort...


Out-of-the-box DataPort

I can use the out-of-the-box Tab Delimited formatter to craft a DataPort project using the settings below.

2017-10-15_18-40-31.png

In the settings section I can specify where the documents are be exported.  Then I scroll down to pick my saved search.  

2017-10-15_18-42-40.png

Lastly, I pick the fields I want.  I must include the "DOS file" to get the electronic attachments.  So for now I'll include the title and DOS file.  

2017-10-15_18-50-32.png

If I save and execute this project I get a meta-data file like this one...

2017-10-15_18-57-31.png

And a set of electronic documents like these...

2017-10-15_18-55-36.png

The forum post asked how these file names could be in record number format.  The existing format is a combination of the dataset ID, the URI, an underscore, and the suggested file name.  If this is as far as I go then I cannot meet the requirement.  

So purely out-of-the-box is insufficient! :(


Out-of-the-box DataPort with Powershell

I think a quick solution could be to directly rename the files exported.  Unfortunately my current export lacks enough meta-data to accomplish the task though.  The file name doesn't include the record number.  Nor does the meta-data file.

But if I add "Expanded number" as a field, I can then directly manipulate the results.

2017-10-15_19-02-09.png

Now my meta-data file looks like this...

2017-10-15_19-04-06.png

Now that I have the meta-data I need I can write a powershell script to accomplish my tasks.  The script doesn't actually need to connect into CM at all (though it's probably best if I looked up the captions for the relevant). 

The script does need to do the following though:

  1. Open the meta-data file
  2. Iterate each record in the file
  3. Rename the existing file on disk
  4. Update the resulting row of meta-data to reflect the new name
  5. Save the meta-data file back.

A quick and dirty conversion of these requirements into code yields the following:

$metadataFile = "C:\DataPort\Export\Out-of-the-box Electronic Export\records.txt"
$subFolder = "C:\DataPort\Export\Out-of-the-box Electronic Export\Documents\"
$metaData = Get-Content -Path $metadataFile | ConvertFrom-Csv -Delimiter "`t"
for ( $i = 0; $i -le $metaData.Length; $i++ ) 
{
    $recordNumber = $metaData[$i]."Expanded Number"
    $existingFileName = $metaData[$i]."DOS file"
    $existingFilePath = [System.IO.Path]::Combine($subFolder, $existingFileName)
    $newFileName = ($recordNumber + [System.IO.Path]::GetExtension($existingFileName))
    $newFilePath = [System.IO.Path]::Combine($subFolder, $newFileName)
    if ( ![String]::IsNullOrWhiteSpace($existingFileName) -and (Test-Path $existingFilePath) -and (Test-Path $newFilePath) -eq $false ) 
    {
        if ( (Test-Path $newFilePath) ) 
        {
            Remove-Item -Path $newFilePath
        }
        Move-Item -Path $existingFilePath -Destination $newFilePath
        $metaData[$i].'DOS file' = $newFileName
    }
}
$metaData | ConvertTo-Csv -Delimiter "`t" -NoTypeInformation | Out-File -FilePath $metadataFile

After I run that script on my DataPort results, I get this CSV file...

2017-10-15_19-24-23.png

And my electronic documents are named correctly...

2017-10-15_19-28-25.png

So with a little creative powershell I can achieve the result, but it's a two step process.  I must remember to execute this after I execute my export.  Granted, I could actually call the export process at the top of the powershell and then not mess with DataPort directly.

This still seems a bit of a hack to get my results.  Maybe creating a new DataPort Export Formatter is easy?


Custom DataPort Export Formatter

The out-of-the-box Tab delimited DataPort formatter works well.  I don't even need to re-create it!  I just need to be creative.

So my first step is to create a new visual studio class library that contains one class based on the IExportDataFormatter interface.

namespace CMRamble.DataPort.Export
{
    public class NumberedFileName : IExportDataFormatter
    {
     
    }
}

If I use the Quick Action to implement the interface, it gives me all my required members and methods.  The code below shows what it gives me...

public string KwikSelectCaption => throw new NotImplementedException();
public OriginType OriginType => throw new NotImplementedException();
 
public string Browse(Form parentForm, string searchPrefix, Point suggestedBrowseUILocation, Dictionary<AdditionalDataKeysDescriptiveData> additionalData)
{
    throw new NotImplementedException();
}
public void Dispose()
{
    throw new NotImplementedException();
}
public void EndExport(Dictionary<AdditionalDataKeysDescriptiveData> additionalData)
{
    throw new NotImplementedException();
}
public void ExportCompleted(ProcessStatistics stats, Dictionary<AdditionalDataKeysDescriptiveData> additionalData)
{
    throw new NotImplementedException();
}
public void ExportNextItem(List<ExportItem> items, Dictionary<AdditionalDataKeysDescriptiveData> additionalData)
{
    throw new NotImplementedException();
}
public string GetFormatterInfo(Dictionary<AdditionalDataKeysDescriptiveData> additionalData)
{
    throw new NotImplementedException();
}
public void StartExport(string exportPath, bool overWriteIfExists, DataPortConfig.SupportedBaseObjectTypes objectType, string TRIMVersionInfo, string[] headerCaptions)
{
    throw new NotImplementedException();
}
public string Validate(Form parentForm, string connectionStringToValidate, Dictionary<AdditionalDataKeysDescriptiveData> additionalData)
{
    throw new NotImplementedException();
}

Now I don't know how the out-of-the-box tab formatter works, and to be honest I don't care how it does what it does.  I just want to leverage it!  So I'm going to create a static, readonly variable to hold an instance of the out-of-the-box formatter.  Then I force all these members and methods to use the out-of-the-box formatter.  It makes my previous code now look like this....

private static readonly ExportDataFormatterTab tab = new ExportDataFormatterTab();
public string KwikSelectCaption => tab.KwikSelectCaption;
 
public OriginType OriginType => tab.OriginType;
 
public string Browse(Form parentForm, string searchPrefix, Point suggestedBrowseUILocation, Dictionary<AdditionalDataKeysDescriptiveData> additionalData)
{
    return tab.Browse(parentForm, searchPrefix, suggestedBrowseUILocation, additionalData);
}
 
public void Dispose()
{
    tab.Dispose();
}
 
public void EndExport(Dictionary<AdditionalDataKeysDescriptiveData> additionalData)
{
    tab.EndExport(additionalData);
}
 
public void ExportCompleted(ProcessStatistics stats, Dictionary<AdditionalDataKeysDescriptiveData> additionalData)
{
    tab.ExportCompleted(stats, additionalData);
}
 
public void ExportNextItem(List<ExportItem> items, Dictionary<AdditionalDataKeysDescriptiveData> additionalData)
{
    tab.ExportNextItem(items, additionalData);
}
 
public string GetFormatterInfo(Dictionary<AdditionalDataKeysDescriptiveData> additionalData)
{
    return tab.GetFormatterInfo(additionalData);
}
 
public void StartExport(string exportPath, bool overWriteIfExists, DataPortConfig.SupportedBaseObjectTypes objectType, string TRIMVersionInfo, string[] headerCaptions)
{
    tab.StartExport(exportPath, overWriteIfExists, objectType, TRIMVersionInfo, headerCaptions);
}
 
public string Validate(Form parentForm, string connectionStringToValidate, Dictionary<AdditionalDataKeysDescriptiveData> additionalData)
{
    return tab.Validate(parentForm, connectionStringToValidate, additionalData);
}

If I compile this and register it within DataPort, I have a new Export DataFormatter that behaves just like the out-of-the-box formatter (trust me, I tested it).  Now what I need to do is to add the logic that renames my files and the corresponding meta-data.

First steps first: I need to store some of the information provided in the StartExport method. 

private bool correctExportedFileName = false;
private string exportPath;
public void StartExport(string exportPath, bool overWriteIfExists, DataPortConfig.SupportedBaseObjectTypes objectType, string TRIMVersionInfo, string[] headerCaptions)
{
    this.exportPath = $"{Path.GetDirectoryName(exportPath)}\\Documents";
    var captions = headerCaptions.ToList();
    var numberField = captions.FirstOrDefault(x => x.Equals(new EnumItem(AllEnumerations.PropertyIds, (int)PropertyIds.AgendaItemExpandedNumber).Caption));
    var fileField = captions.FirstOrDefault(x => x.Equals(new EnumItem(AllEnumerations.PropertyIds, (int)PropertyIds.RecordFilePath).Caption));
    if ( numberField != null & fileField != null )
    {
        correctExportedFileName = true;
    }
    tab.StartExport(exportPath, overWriteIfExists, objectType, TRIMVersionInfo, headerCaptions);
}

Note that in the code above I've had to do a couple of seemingly dodgy things:

  1. I had to hard-code the name of the subfolder because it's not avialable to me (so weird I can't access the project details)
  2. I used the AgendaItemExpandedNumber property Id because that's what maps to the record's expanded number (weird, I know)

All that's left to do is to fix the file and meta-data!  I do that in the ExportNextItem method.  That method is invoked each time an object has been extracted.  So that's when I need to do the rename and meta-data correction.  

My method becomes:

public void ExportNextItem(List<ExportItem> items, Dictionary<AdditionalDataKeysDescriptiveData> additionalData)
{
    if ( correctExportedFileName )
    {
        var numberField = items.FirstOrDefault(x => x.ItemCaption.Equals(new EnumItem(AllEnumerations.PropertyIds, (int)PropertyIds.AgendaItemExpandedNumber).Caption));
        var fileField = items.FirstOrDefault(x => x.ItemCaption.Equals(new EnumItem(AllEnumerations.PropertyIds, (int)PropertyIds.RecordFilePath).Caption));
        if ( numberField != null && fileField != null )
        {
            var originalFileName = Path.Combine(exportPath, fileField.ItemValue);
            if ( File.Exists(originalFileName) )
            {
                var newFileName = $"{numberField.ItemValue}{System.IO.Path.GetExtension(fileField.ItemValue)}";
                var newFilePath = Path.Combine(exportPath, newFileName);
                if (File.Exists(newFilePath) && File.Exists(originalFileName))
                {
                    File.Delete(newFilePath);
                }
                File.Move(originalFileName, newFilePath);
                fileField.ItemValue = newFileName;
            }
        }
    }
    tab.ExportNextItem(items, additionalData);
}

Now if I compile and export, my meta-data file looks exactly the same as the previous method (out-of-the-box with powershell)!

Feel free to try out my DataPort Formatter here.