Generating Statistics and Uploading to Power BI

Another question over on the forum!  This time about generating statistics about how the system is being used.  I thought I might share something I played with earlier.

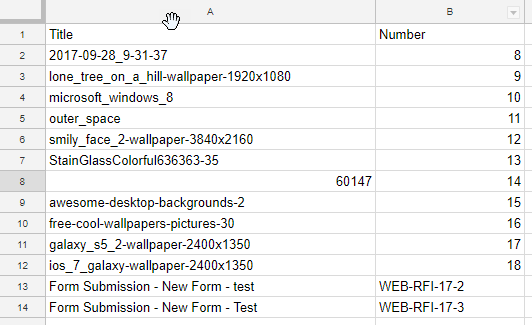
First I created a powershell script that generates a CSV file.  To add a row to the file, I search for the number of records registered every day between 1/1/2010 and today.  I track the registration counts separately per record type; and I don't track a day where 0 were registered for a given type.

My results look like this...

2017-10-19_16-25-22.png

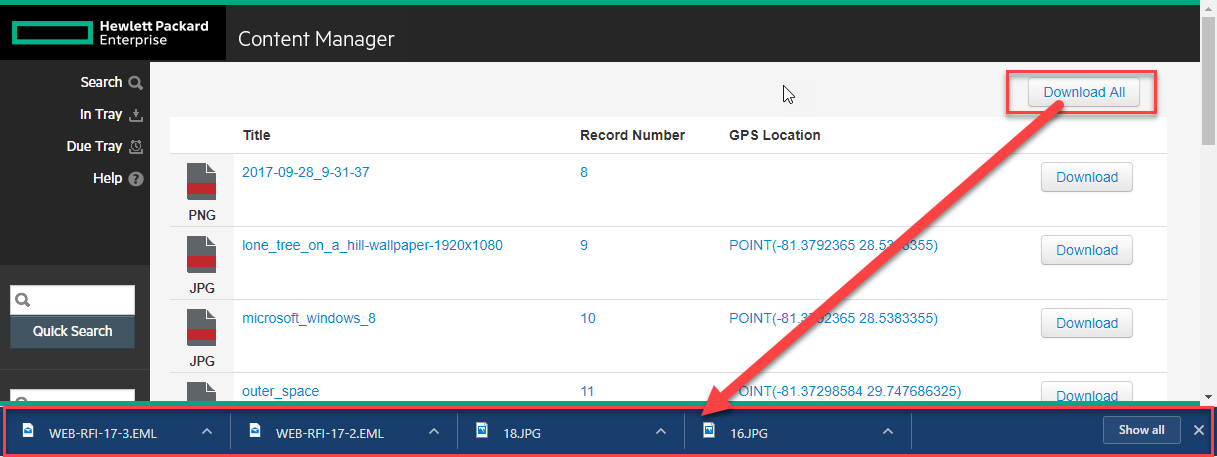
Once my extraction of metrics was completed, I created a free account on Power BI and uploaded the 20,000 row CSV file. I then created a few reports....

Here's one that includes filters the dataset to the previous two years and then displays the results in 3 different ways.  I can see year-over-year comparisons highlighting the growth of electronic records.  I could easily add ownership/business unit as an export metric too.

2017-10-19_19-14-22.png

I don't have to have a report either.  They have an interactive "Ask a question" feature that lets you click you way into selecting from the dataset.

2017-10-19_19-20-08.png

If you like this solution, give it a whirl!  Here's the powershell script I used to generate these metrics.

Add-Type -Path "D:\Program Files\Hewlett Packard Enterprise\Content Manager\HP.HPTRIM.SDK.dll"
$db = New-Object HP.HPTRIM.SDK.Database
$db.Connect
 
$startDate = (Get-Date -Year 2010 -Month 1 -Day 1)
$endDate = (Get-Date -Year 2017 -Month 12 -Day 31)
$totalDays = (New-TimeSpan -Start $startDate -End $endDate).Days
 
$metrics=$null
$metrics=@()
$x = 0
for($date = $startDate; $date -lt $endDate; $date = $date.AddDays(1))
{
    $x++
    $dateString = ($date.ToShortDateString()) 
    Write-Progress -id 1 -Activity "Gathering Metrics" -Status "$($dateString)" -PercentComplete (($x/$totalDays)*100) 
    $recordTypes = New-Object HP.HPTRIM.SDK.TrimMainObjectSearch -ArgumentList $db, RecordType
    $recordTypes.SearchString = "all"
   
    $y = 0
    foreach ( $recordType in $recordTypes ) 
    {
        $y++
        $recordsOfType = New-Object HP.HPTRIM.SDK.TrimMainObjectSearch -ArgumentList $db, Record
        $recordsOfType.SearchString = "registeredOn:$($dateString) type:$($recordType.Uri)"
 
        if ( $recordsOfType.Count -gt 0 ) {
            $metric = new-object PSObject 
            $metric | add-member -membertype NoteProperty -name "Record Type Name" -Value $recordType.Name
            $metric | add-member -membertype NoteProperty -name "Date" -Value $dateString
            $metric | add-member -membertype NoteProperty -name "Count" -Value $recordsOfType.Count
            $metrics += $metric
        }
    }
}
$metrics | Export-Csv "E:\temp\metrics.csv" -NoTypeInformation

Once you've executed the script you login to Power BI and create a new dataset.  

2017-10-19_19-32-01.png

Then I picked Files and selected the output from the Powershell

2017-10-19_19-32-29.png

Then I created a new report and played with the interface until I got the dashboard in the original screenshot.  Once I was done I went back and updated my powershell script so that I can run it each day and it posts to the REST service.  I then scheduled the powershell to run daily and now have a dashboard with new metrics each day!.

If you want a script that does exactly what the original poster did, here's a script for that.  The approach is different, as it processes all system activity.  The first script simply checks each day for specific values.

Add-Type -Path "D:\Program Files\Hewlett Packard Enterprise\Content Manager\HP.HPTRIM.SDK.dll"
$db = New-Object HP.HPTRIM.SDK.Database
$db.Connect
$events = New-Object HP.HPTRIM.SDK.TrimMainObjectSearch -ArgumentList $db, History
$events.SearchString = "objectType:Record date:this year"
$history = $events | where Record 
 
$metrics = @{}
foreach ( $event in $history ) 
{
    $recTypeName = ([HP.HPTRIM.SDK.History]$event).Record.RecordType.Name
    if ( $metrics.Contains($recTypeName) ) 
    {
        $metrics[$recTypeName]++
    }
    else 
    {
        $metrics.Add($recTypeName,1)
    }
}
$metrics| Format-Table -AutoSize

I didn't really have any requirements so the output for this script is light at the moment.  The metrics are still interesting though.  The values represent how many actions have been performed by record type for the current year.  So there have been 40 "events" on Request for Information records so far this year.

2017-10-19_19-25-42.png

Security Breaches 101

When I provide training for Content Manager I always start with security.  It doesn't matter if security is a major concern for the organization or not.  The main reason I do this, besides just needing to explain how it works, is to minimize the occurrences of security breaches.  A security breach is a system flag indicating that the objects associated with a record are not in alignment with the security paradigm.  

There are two places that you can define the behavior of security breaches within the software: the security tab of the system options and on the properties of a record type.  If I use the out-of-the-box configuration of Content Manager, the former is set to "Display Warning" and the latter is set to "Ignore".  For the moment I'll focus on the first.

Here's the option I'm talking about:

 
System Options for Movement policy

System Options for Movement policy


If you press F1 you'll see a description for the setting, shown below.

 
When changing Assignee, Home or Owner for a Record to a less secure Location - set the method of Location change when a selected record has a lower security classification than the Location. See also Security breaches.

The options are
•Ignore
•Display Warning - default
•Prevent
 

If I lookup "Security breaches", as it recommends, I get this description:

 
This function enables a HPE Content Manager administrator to view and print occurrences of security breaches that may have occurred.

Security breaches appear in an Historical Events dialog box with all other events that have occurred, for example, Location and container changes and movement history.

By default, the security breaches function will only show security breaches for the current day.

For events to be logged, the relevant event must be selected in the Audit tab of the Record Type.
 

The end result is a pop-up message like this:

2017-10-18_5-34-58.png

Funny!  I have the "Display warning" option selected but it still won't let me save it.  I feel bad for developers at times... having to maintain this complex web of features and then having silly bugs like this.  In a non-buggy build I would be able to click OK and continue on saving the record. For now I'll work around the bug by assigning it to myself and then reassigning it to Elmer.

Once I've done that I can go check out the online audit log.  It will show me all the activity for today, including the right-most column that indicates if a security breach was detected.  The screenshot below shows a series of assignments.  Note the assignments to Elmer are breaches but the one to myself is not.

2017-10-18_5-42-45.png

To resolve this I need to find out what's missing from Elmer's profile.  Now you might think I could use the View Rights feature whilst impersonating Elmer, but you'd be wrong!  As shown below, the UI is indicating the security profile is met by Elmer... but I suspect this is another bug

2017-10-18_5-48-20.png

Instead, I look at the security profile of the record.  I see that it has a security caveat of "HR"...

2017-10-18_5-49-29.png

Now if I look at my location structure I can see the problem...

2017-10-18_22-03-26.png

When I on-boarded Elmer I didn't give him a security profile.  So it makes sense that assigning something to him would breach the security of the record.  Elmer is completely unaware because he can't even access the record.  So this notification is the administrator's opportunity to fix the problem.  To resolve it I need to add the HR caveat to Elmer's profile.

The situation happens anytime you've elected to use a mixture of security levels and caveats.  The best example is a secured facility's mail room, where they may be indexing incoming correspondence and assigning it to the wrong person accidentally.  For that scenario they should be prevented from continuing, because we can't deliver the item as we register it officially.  In other environments it's not the end of the world... it's something to manage.  

If you take a look at this question over on the forum, you'll see a common situation.  Imagine how much time he's going to have to spend fixing this problem!  For a 50 user or less implementation it's a quick task; but for a 5,000 user site, good luck.  He might want to engage a developer within his organization or a knowledgeable consultant.

I thought I'd be creative and write a powershell script to sort this out for him, but no such luck.  It executes fine but doesn't actually save the updated security profile.  Maybe a developer will read this and fix it! :)

Add-Type -Path "D:\Program Files\Hewlett Packard Enterprise\Content Manager\HP.HPTRIM.SDK.dll"
$db = New-Object HP.HPTRIM.SDK.Database
$db.Connect
$breaches = New-Object HP.HPTRIM.SDK.TrimMainObjectSearch -ArgumentList $db, History
$breaches.SearchString = "breach"
foreach ( $breach in $breaches ) 
{
    $location = ([HP.HPTRIM.SDK.History]$breach).MovementLocation
    $unit = $location.Unit
    $recordProfile = ([HP.HPTRIM.SDK.History]$breach).Record.SecurityProfile
    if ( $unit -ne $null -and $unit.SecurityProfile.CanAccess($recordProfile) ) {
        $location.SecurityProfile.UpgradeTo($unit.SecurityProfile)
        $location.Save()
        Write-Host "Updating $($location.FullFormattedName) to security profile of $($unit.FullFormattedName)"
    }
}

Executing this will at least give me a report of all the users that should be updated.  The example below lists Elmer Fudd twice, exactly as shown in the online audit log.  

2017-10-18_21-59-19.png

Export Mania 2017 - Webdrawer

This is the fourth of four posts related to the exportation of records from Content Manager.  Here I'll review a little of the feature functionality within Webdrawer.  You may wish to review the first three posts before continuing below (DataPort, Tag & Task, Record Addin).

The out-of-the-box webdrawer interface provides three opportunities to download an electronic attachment.  Each of these options will direct the user's browser to a URL that delivers the attachment to the browser.  The name of the downloaded file will be the suggested file name property.  

In the screenshot below you can see the download link (appears as 'Document') to the right.  The same link is provided within the viewer, which appears when you select the Preview link. 

Record Detail Page download link

Record Detail Page download link

The downloaded file name in this example ends up being "2017-09-28_9-31-37.png".  

The third option exists as an option in the configuration file.  The default setting is "Metadata", but you can change this to "Document".  You could also change it to preview (which shows you the preview, which then provides a download link).  

2017-10-17_17-35-20.png

If I make this change (to Document) then clicking on a link in the search results page results in the file being downloaded.  

2017-10-17_17-42-29.png

I can't say I find that very useful, but it is what it is.  I'll revert this back to a metadata link and then explore options. 

One quick win is to add the "download" attribute to a link.  This works for Chrome and Firefox for sure, but if you're using Internet Explorer STOP IT.  I modified my resultsList.cshtml file (located in the Views/Shared directory) and added a new column with a new button.

2017-10-17_18-16-20.png

To accomplish this I made three changes.  First I added a new column in the table header row, like shown below.

2017-10-17_18-21-04.png

Next I created a variable that contains my desired file name...

var desiredFileName = record.GetPropertyOrFieldString("RecordNumber") + "." + record.GetPropertyOrFieldString("RecordExtension");

var desiredFileName = record.GetPropertyOrFieldString("RecordNumber") + "." + record.GetPropertyOrFieldString("RecordExtension");

Then I added my column, as shown below...

2017-10-17_18-23-02.png

Now these links will download the file using my desired convention!  Next I should go ahead and add a "Download All" link at the top.  That button uses jquery to iterate all of the buttons I added and clicks each one.

Download All clicks all download buttons sequentially

Download All clicks all download buttons sequentially

The javascript for this is below.    

 
function downloadFiles() {
    $('a:not([download=""])').each(function() {
        if ( this.href.indexOf('/Record/') > 0 && this.id.indexOf('.') > 0 ) {
            this.click();
        }
    });
}
 

In order for it to work, you must also add the desiredFileName value into the anchor's ID property.

 
<a id="@desiredFileName" download="@desiredFileName" href="@recordUrl">Download</a>
 

I should also give a meta-data file though too, no?  To accomplish this I add a button at the top and have it call "downloadMetadata".  

2017-10-17_19-01-18.png

The meta-data file includes the title and record number, but it could include anything you want...

2017-10-17_19-00-19.png

To get this to work I first needed to give myself a way to access each row in the results table, as well as a way to access the meta-data values.  I did this by decorating the row with a class and the column values with IDs.  The screenshot below shows these two modifications.

2017-10-17_19-04-24.png

Lastly, I added a new javascript function into the webdrawer.js file.  I've included it below for reference.

function downloadMetadata() {
    var data = [['Title','Number']];
    $('tr.record').each(function() {
        var title = $(this).find('#RecordTitle').text();
        var number = $(this).find('#RecordNumber').text();
        data.push([title, number]);
    });
    var csvContent = "data:text/csv;charset=utf-8,";
    data.forEach(function(infoArray, index){

       dataString = infoArray.join('\t');
       csvContent += index < data.length ? dataString+ "\n" : dataString;

    }); 
    var encodedUri = encodeURI(csvContent);
    var link = document.createElement("a");
    link.setAttribute("href", encodedUri);
    link.setAttribute("download", "meta-data.csv");
    document.body.appendChild(link);
    link.click(); 
}

So much more can be done, like zipping all the results via JSZip.  As mentioned before, I could also include all results of the search, if necessary.  Hopefully this gives the OP some ideas about how to tackle their business requirement.